Vous rêvez de générer automatiquement des images de haute qualité pour vos articles de blog, vos fiches produits ou vos réseaux sociaux ? Vous utilisez Midjourney, mais vous butez sur l’absence d’API officielle pour automatiser votre production ? Dans cet article, je vous dévoile la méthode complète pour connecter Midjourney à Make.com (anciennement Integromat) grâce à un outil innovant encore très peu connu en France : UserAPI.ai.
1. Le défi : automatiser la création d’images Midjourney malgré l’absence d’API
Midjourney est rapidement devenu l’une des références en matière de génération d’images par intelligence artificielle. Malgré sa puissance, il lui manque un élément-clé : une API officielle permettant d’automatiser des tâches répétitives, comme la génération d’images en masse pour un site e-commerce ou un blog.
C’est là qu’intervient UserAPI.ai. Cet outil va se connecter directement à votre compte Discord (qui, lui, est relié à Midjourney) afin de communiquer avec Midjourney comme si vous le faisiez manuellement. Concrètement, ce service :
- Va reproduire (via une autorisation spéciale) vos envois de prompt à Midjourney dans un canal Discord.
- Récupérera la réponse de Midjourney (les quatre images générées).
- Permettra d’upscaler l’une des images pour obtenir le fichier en haute résolution.
En somme, UserAPI.ai fait office de “pont” entre votre outil d’automatisation (Make.com) et Midjourney, comblant l’absence d’API officielle.
2. Les prérequis : configuration des différents comptes
Avant de démarrer, vous aurez besoin de créer ou de vérifier l’existence de plusieurs comptes et services :
2.1. Compte Discord + Midjourney
- Créer un compte Discord : rendez-vous sur discord.com et inscrivez-vous si ce n’est pas déjà fait.
- Souscrire à Midjourney :
- Rejoignez le serveur Midjourney sur Discord.
- Tapez la commande
/subscribeou/infodirectement auprès du bot Midjourney pour accéder à votre panel d’abonnement. - Choisissez une formule payante (par exemple 30 $/mois) si vous prévoyez de générer beaucoup d’images. Tout abonnement payant vous permettra l’utilisation via UserAPI.
2.2. Compte OpenAI (pour ChatGPT et le Playground)
- Rendez-vous sur platform.openai.com et connectez-vous.
- Ajoutez une carte de paiement et des crédits (par exemple 10 $) pour utiliser l’API.
- Créez un assistant personnalisé dans l’interface Playground si vous souhaitez automatiser la création de prompts complexes pour Midjourney (cf. section 3).

2.3. Compte UserAPI.ai
- Allez sur le site userapi.ai et créez un compte.
- Rechargez votre compte pour payer à la requête (4 centimes l’image) ou souscrivez à un abonnement si vous générez plus de 600 images par mois.
- C’est UserAPI qui se chargera d’envoyer vos prompts à Discord/Midjourney et de récupérer les images.
2.4. Compte Make.com
- Créez un compte Make.com ou connectez-vous si vous en avez déjà un.
- Make.com sera notre outil d’automatisation : il orchestrera l’envoi d’informations à ChatGPT (pour générer le prompt), puis à UserAPI (pour générer l’image Midjourney), avant de récupérer le résultat et de l’héberger ou de l’insérer où vous voulez.
Une fois ces comptes configurés, vous êtes prêt pour la suite.
3. Créer et configurer un assistant ChatGPT pour générer des prompts plus précis
Midjourney est puissant, mais pour obtenir des images ciblées et cohérentes, il faut des prompts bien pensés. Or, écrire ces prompts à la main peut vite devenir chronophage, surtout pour un volume important d’images.
La solution : créer un assistant ChatGPT (sur la plateforme OpenAI) qui saura transformer quelques informations clés (titre d’article, couleur d’ambiance, type de produit, style souhaité, etc.) en prompt Midjourney détaillé.
3.1. Pourquoi créer un assistant ChatGPT spécifique ?
- Gagner du temps : vous n’avez plus besoin de rédiger le prompt complet à chaque fois.
- Conserver une cohérence visuelle : l’assistant applique toujours la même structure, ce qui garantit des visuels homogènes (format d’image, style, ambiance, etc.).
- Éviter les prompts “farfelus” : vous “formez” votre assistant avec une suite d’instructions précises, pour qu’il sache comment répondre.
3.2. Exemple d’instructions (prompt) pour l’assistant
Imaginons que vous souhaitiez générer systématiquement :
- Une photographie ultra-réaliste.
- Un format en 16:9 (pour un blog ou une bannière).
- Une ambiance couleur personnalisée (issue d’une colonne Google Sheet).
- Un style contemporain.
Vous pouvez préciser tout cela dans le “system prompt” de votre assistant (accessible via le Playground OpenAI). Indiquez aussi que l’assistant doit toujours terminer sa réponse par une ligne mentionnant tel format, telle date, etc.
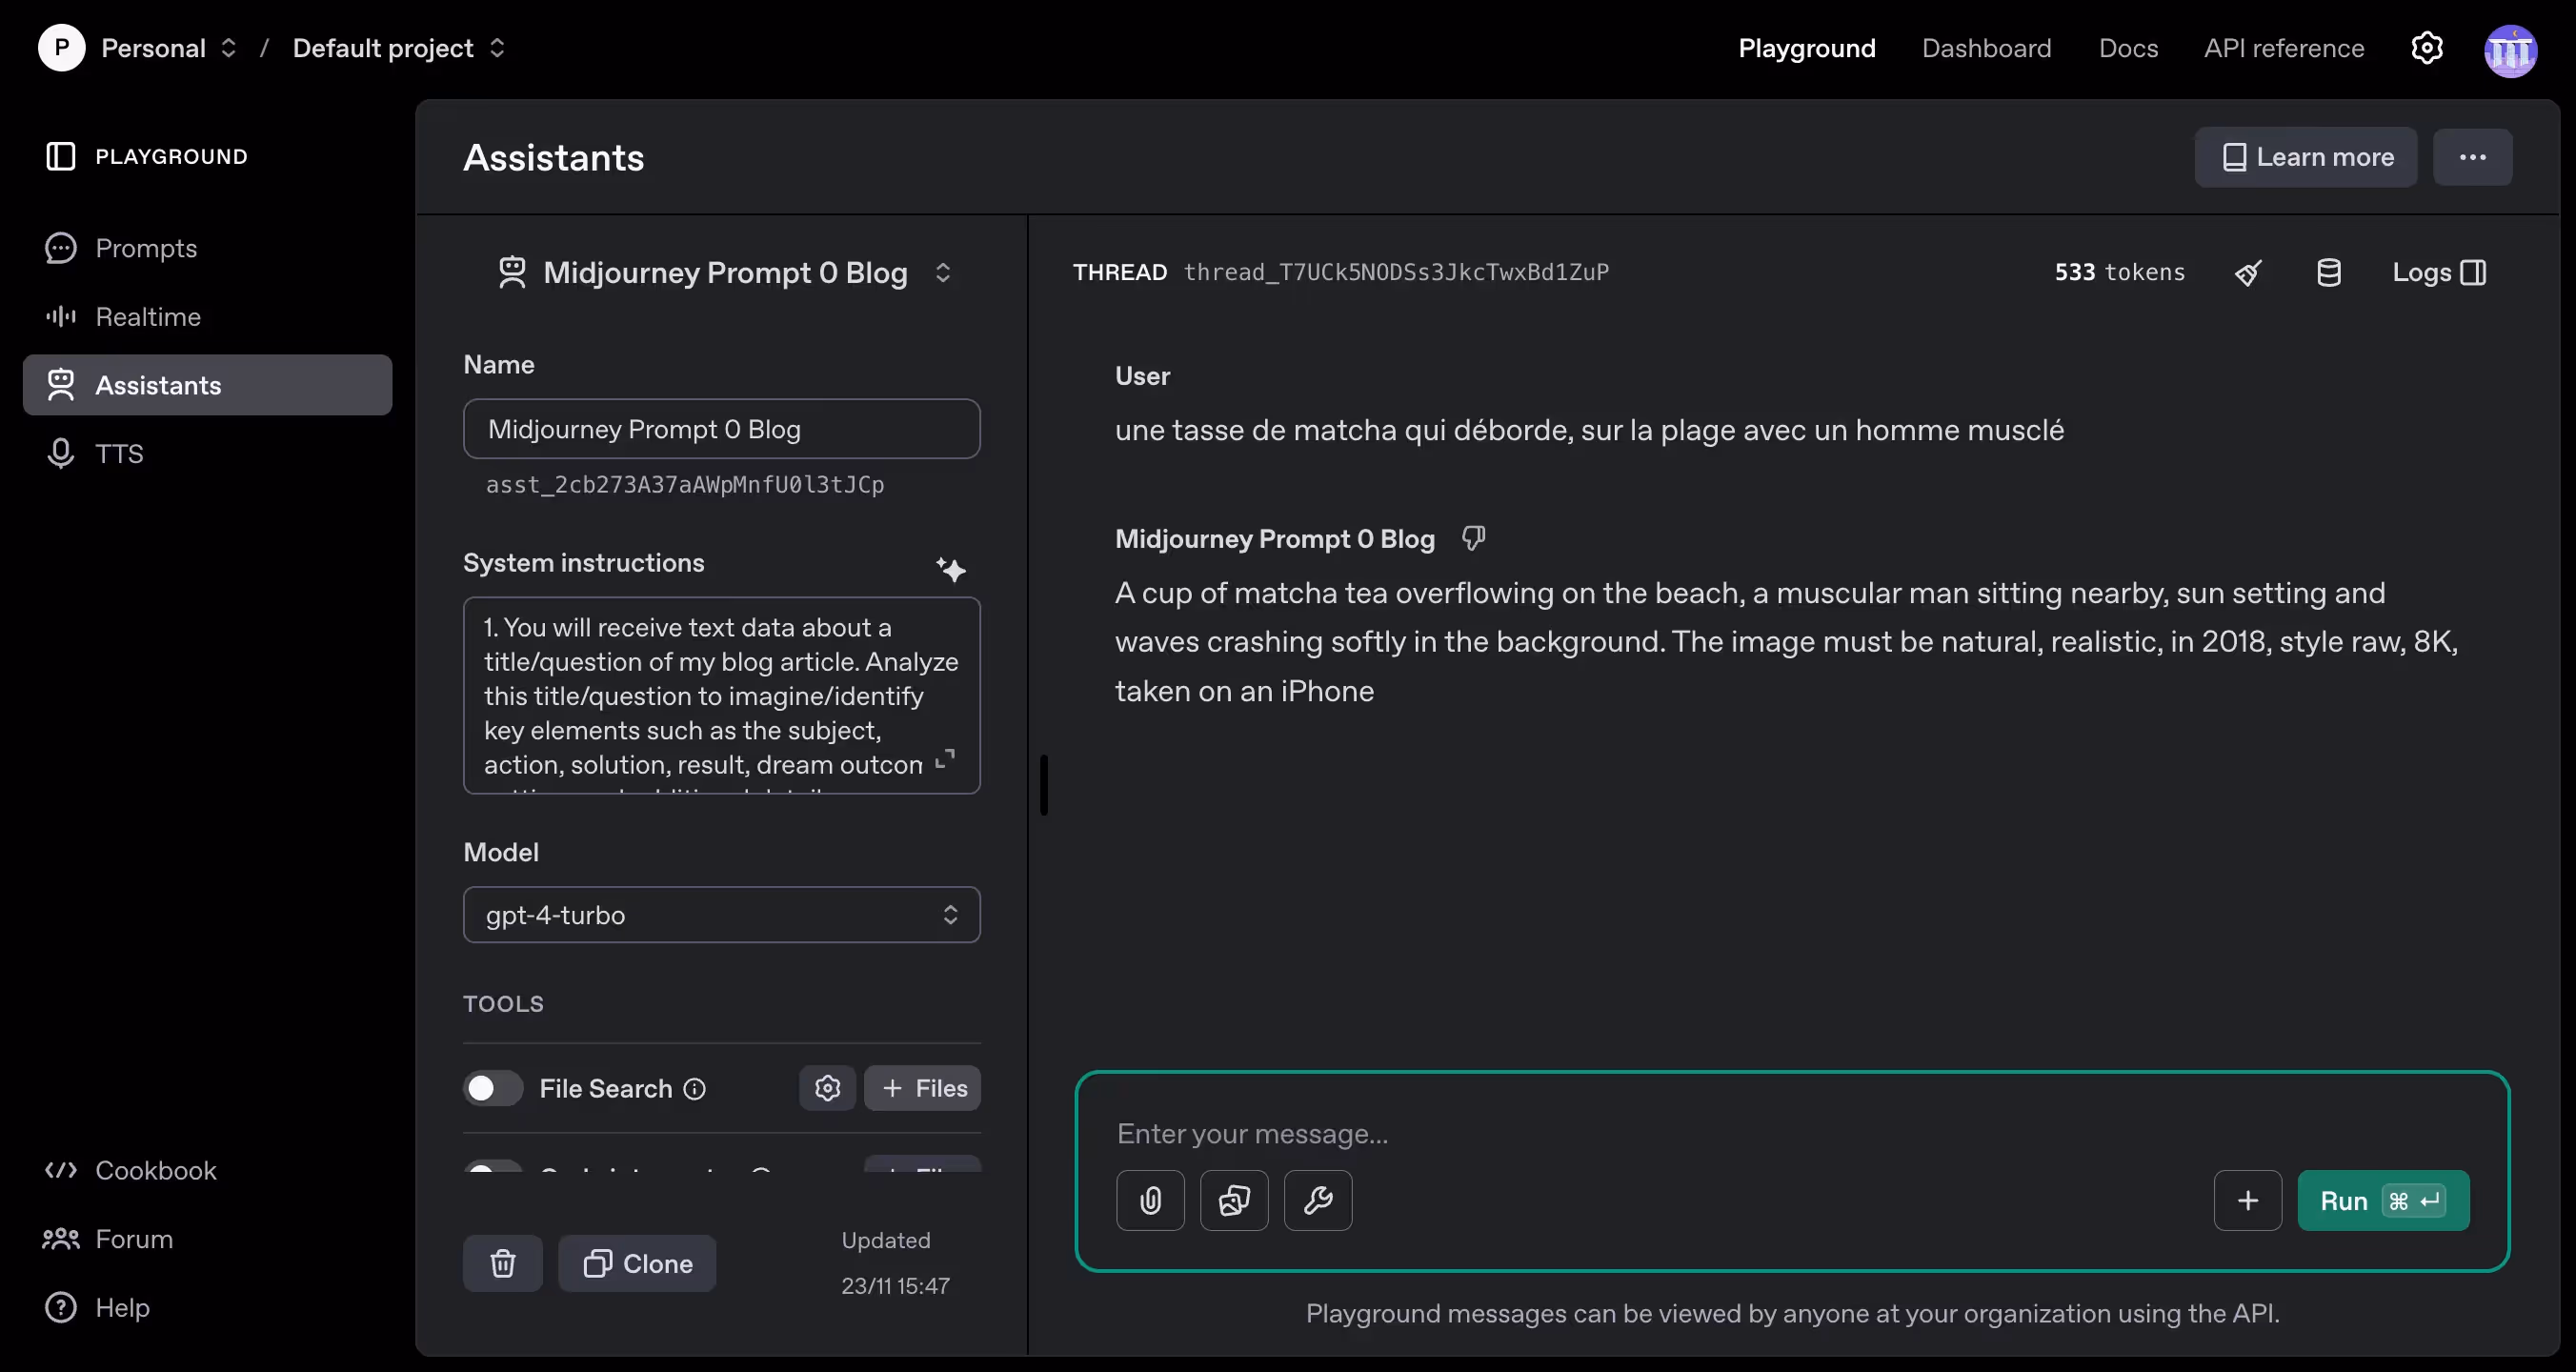
Le meilleur prompt (celui de ma vidéo) :
1. You will receive text data about a title/question of my blog article. Analyze this title/question to imagine/identify key elements such as the subject, action, solution, result, dream outcome, setting, and additional details.
2. Use the information extracted from the text and image to fill, in english, in the following Midjourney prompt template:
[subject], [action], [setting], [additional details]. The image must be natural, realistic, in 2018, style raw, 8K, taken on an iPhone
- [subject] should be the main focus of the image, like a person, object, creature, or concept
Be as specific as possible
- [action] should describe what the subject is doing using active, descriptive verbs
- [setting] should paint a vivid picture of the location, background, or environment surrounding the subject
- [additional details] can include extra elements to enhance the image, such as clothing, colors, lighting, composition, or artistic references
3. Always end the generated prompt with the exact phrase: "The image must be natural, realistic, in 2018, style raw, 8K, taken on an iPhone"
4. Ensure that the final prompt is well-formatted and includes all the necessary components, Avoid incomplete or poorly structured prompts,
NEVER USE '.'
NEVER FINISH A OUTPUT PROMPT WITH A DOT
NEVER use the branded name of the product, just the classic name of the common object.
5. Output the complete Midjourney prompt, ready for use
Example input text:
"In the heart of a dense forest, a majestic stag stands alert, its antlers glistening in the dappled sunlight filtering through the canopy. The rich earthy hues of the foliage create a vivid backdrop for the striking creature"
Example output prompt:
A majestic stag standing alert in the heart of a dense forest, antlers glistening in dappled sunlight, rich earthy hues of foliage creating a vivid backdrop. The image must be natural, realistic, in 2018, raw style, 8K, taken on an iPhone
3.3. Check the prompt in Midjourney
Once satisfied, test the prompt generated by your assistant directly on Discord (in your private chat with the Midjourney bot).
- If the image meets your expectations (size, style, color, subject, etc.), you can then automate this whole process via Make.com.
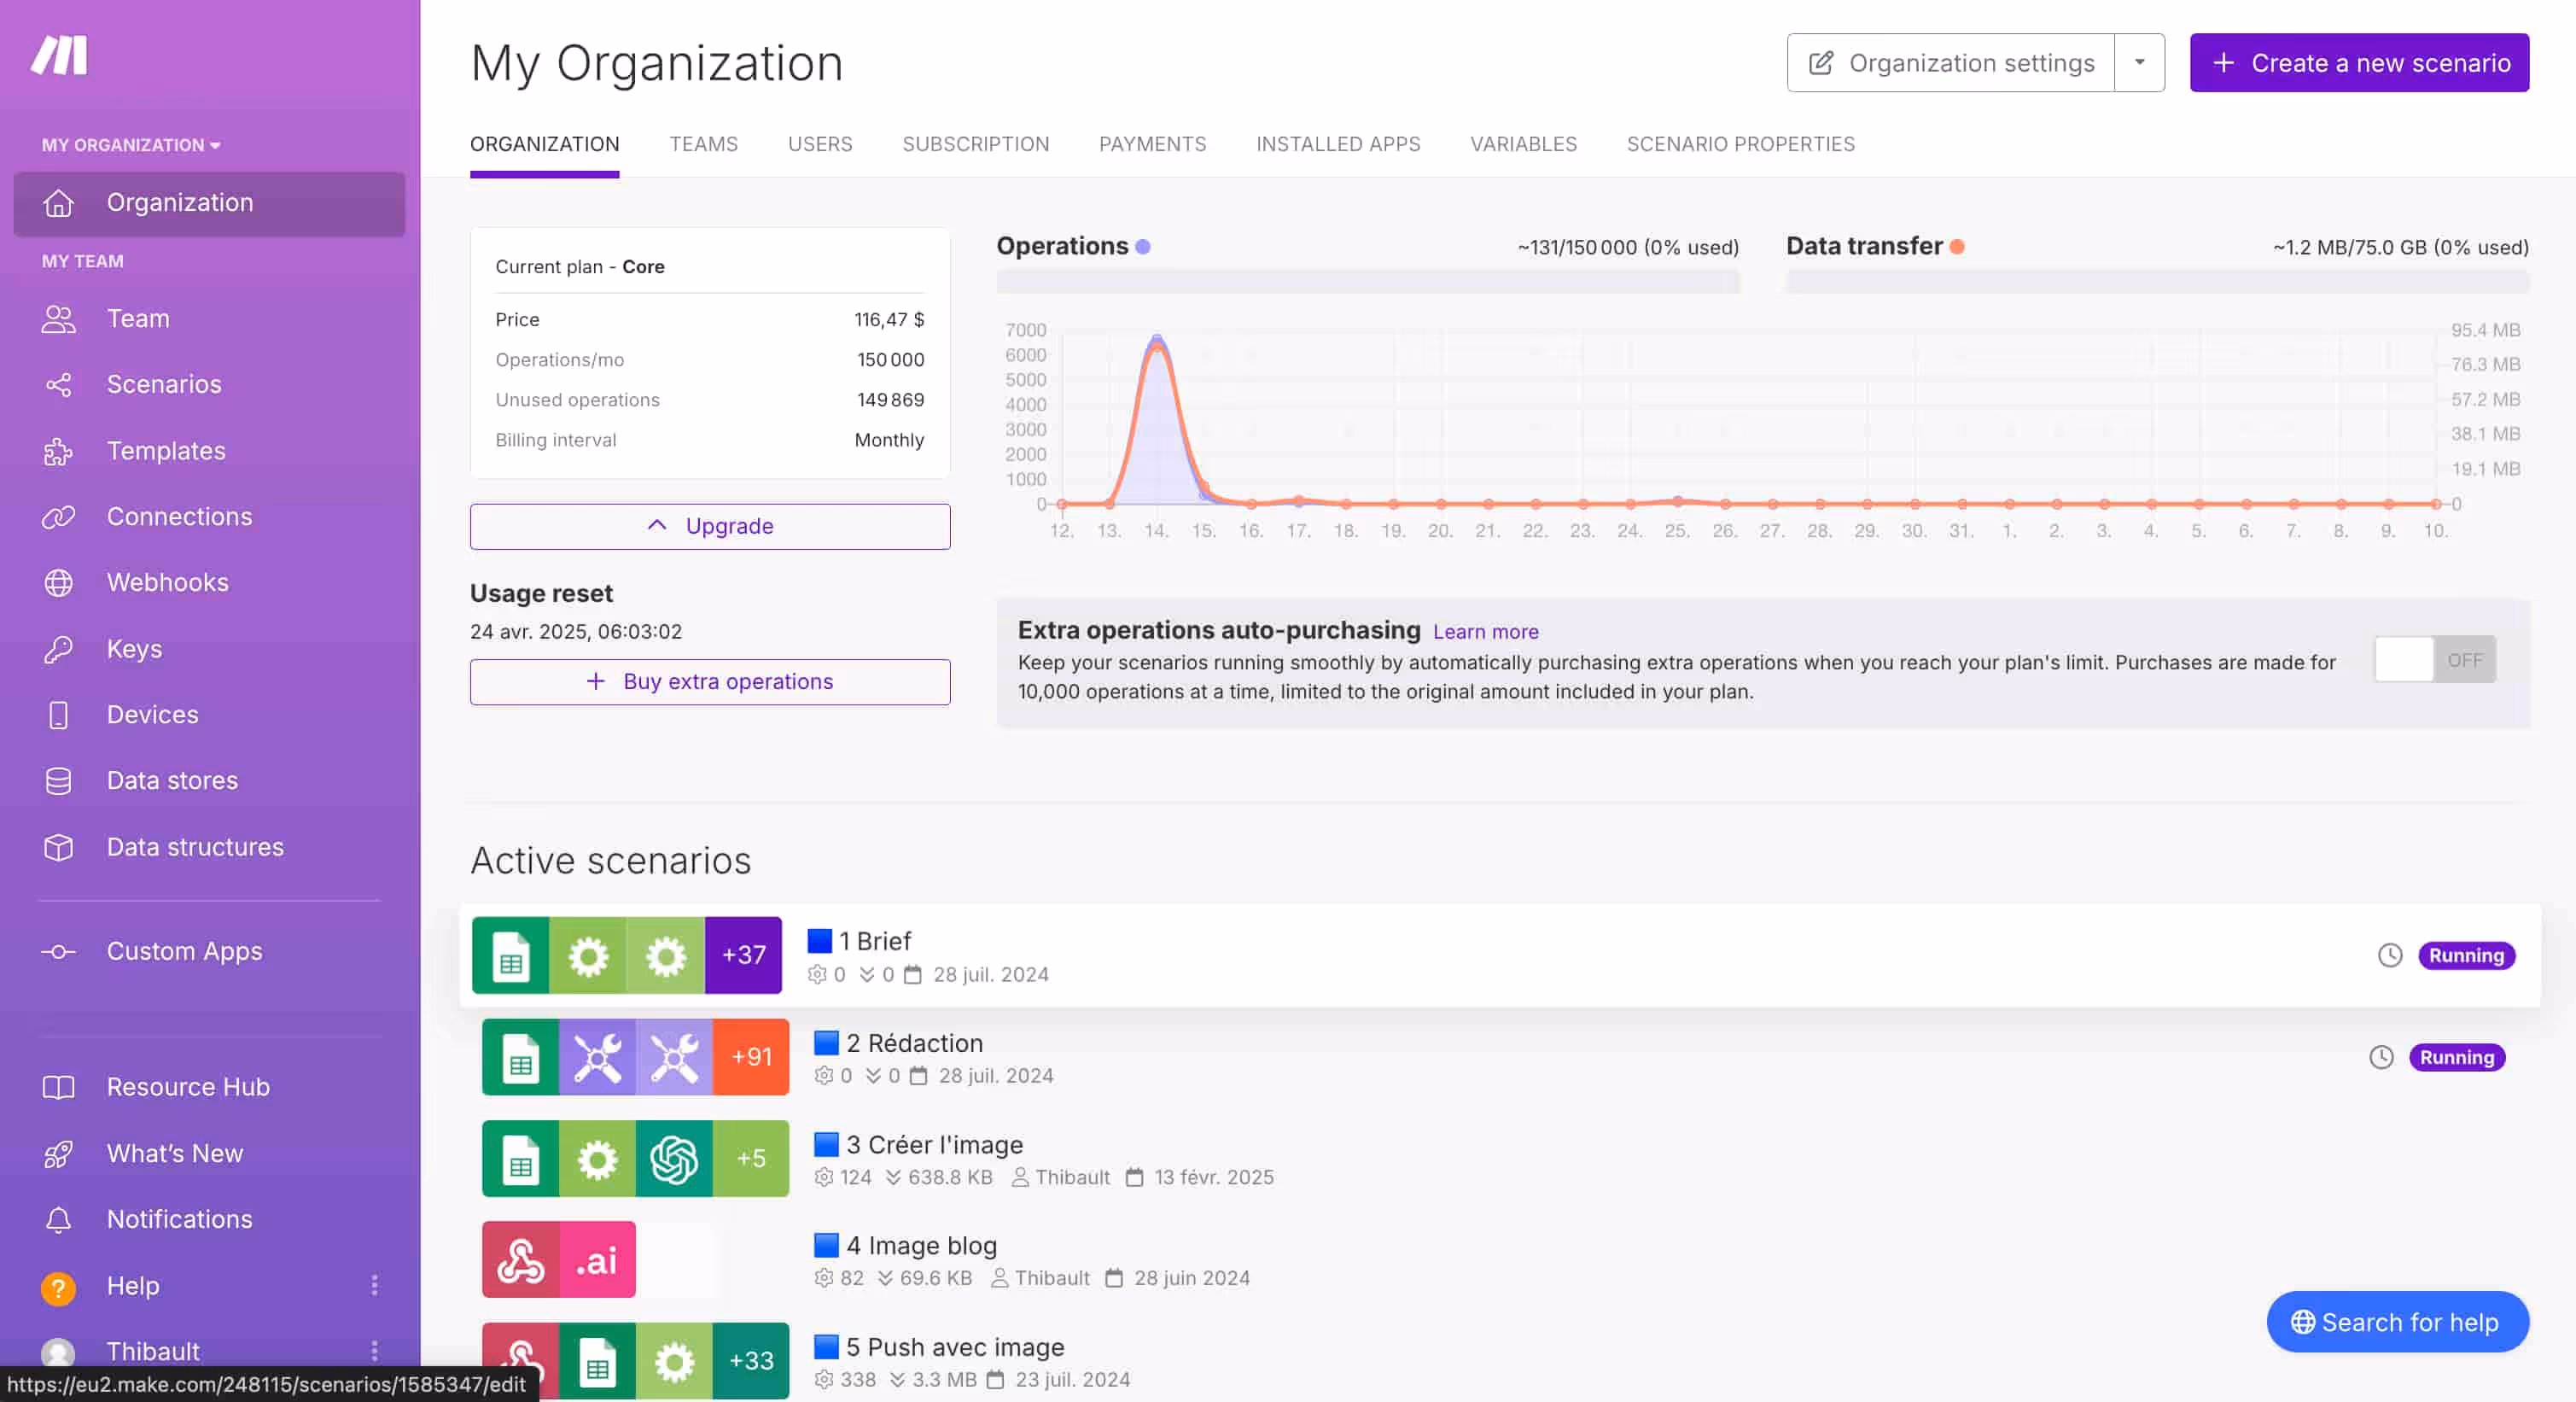
4. Set up the three essential Make.com scenarios
Automation does not happen in a single block. Three scenarios (or “multiple scenarios”) are often required:
- Scenario A: Sending the prompt to userApi (which will create the image request from Midjourney).
- Scenario B: Upscale of the selected image (because Midjourney returns 4 thumbnails first, you have to “upscale” the best one).
- Scenario C: Final image recovery, compression, and integration into your CMS (WordPress, Shopify, Webflow, etc.).
4.1. Scenario A: Generate the prompt and send it to Midjourney via userApi
- Google Sheets module (optional) : it stores information that varies from one image to another (article title, color, angle, style, etc.).
- ChatGPT module (type “Create a Chat Completion”):
- Log in to your OpenAI account.
- Select the assistant you created (“Midjourney Prompt Blog” or other).
- Pass values from Google Sheets (or another module).
- Get the response (your “final prompt”).
- UserApi module (“Create an image” type or equivalent):
- Fill in your Discord account token (see section 2.3).
- Paste theAPI Key from userApi.
- Indicate the prompt generated by the ChatGPT assistant.
- Set up the Webhook URL to be notified once the 4 images are ready.
Important note : To recover your “Discord token”, you must:
- Open Discord, go to the Midjourney bot, type
/info(or/subscribe). - Open the console (Inspect > Network > Headers > “Authorization”).
- Copy the key (sequence of alphanumeric characters and dots).
- Paste it into UserApi when you add a Discord account.
4.2. Scenario B: Upscale of the selected image
The main challenge comes from the fact that Midjourney returns four vignettes from a single prompt. You must therefore “ask” for a high-resolution version of the one you like.
- Webhook :
- After generating the 4 images, the userApi module will send a Webhook to Make.com.
- UserApi module “Upscale an image by position” :
- Enter the ID of the previous generation.
- Indicate which position (1, 2, 3, or 4) you want to upscale.
- Set up a callback webhook again to be notified when the upscale is ready.
4.3. Scenario C: Retrieve and optimize the image
- New Webhook :
- You will receive the link to the upscaled image.
- (Optional) ChatGPT module :
- Generates a file name and/or an “SEO-friendly” ALT tag.
- (Optional) CloudConvert module :
- Convert the PNG file to WebP for reduce weight and speed up the loading on your site.
- Final module :
- Integration on your CMS (WordPress, Shopify, Webflow) or storage on Google Drive, etc.
- Give the file the name generated earlier and an ALT tag optimized for SEO.
5. Compression, ALT tag and integration into your CMS
An essential point that should not be overlooked: The size of the images. Overly heavy visuals slow down the loading time of your site, which can affect the user experience and SEO.
- CloudConvert : handy tool for converting PNG to WebP.
- ALT tag : reinforces accessibility and SEO (enter your main keyword in it).
- File name : avoid randomly generated image names (e.g. “img_xz029.png”). Prefer a short and explicit description (e.g. “cup-macha-beach-man-muscle.webp”).
6. Concrete example: generating images for a blog via Midjourney
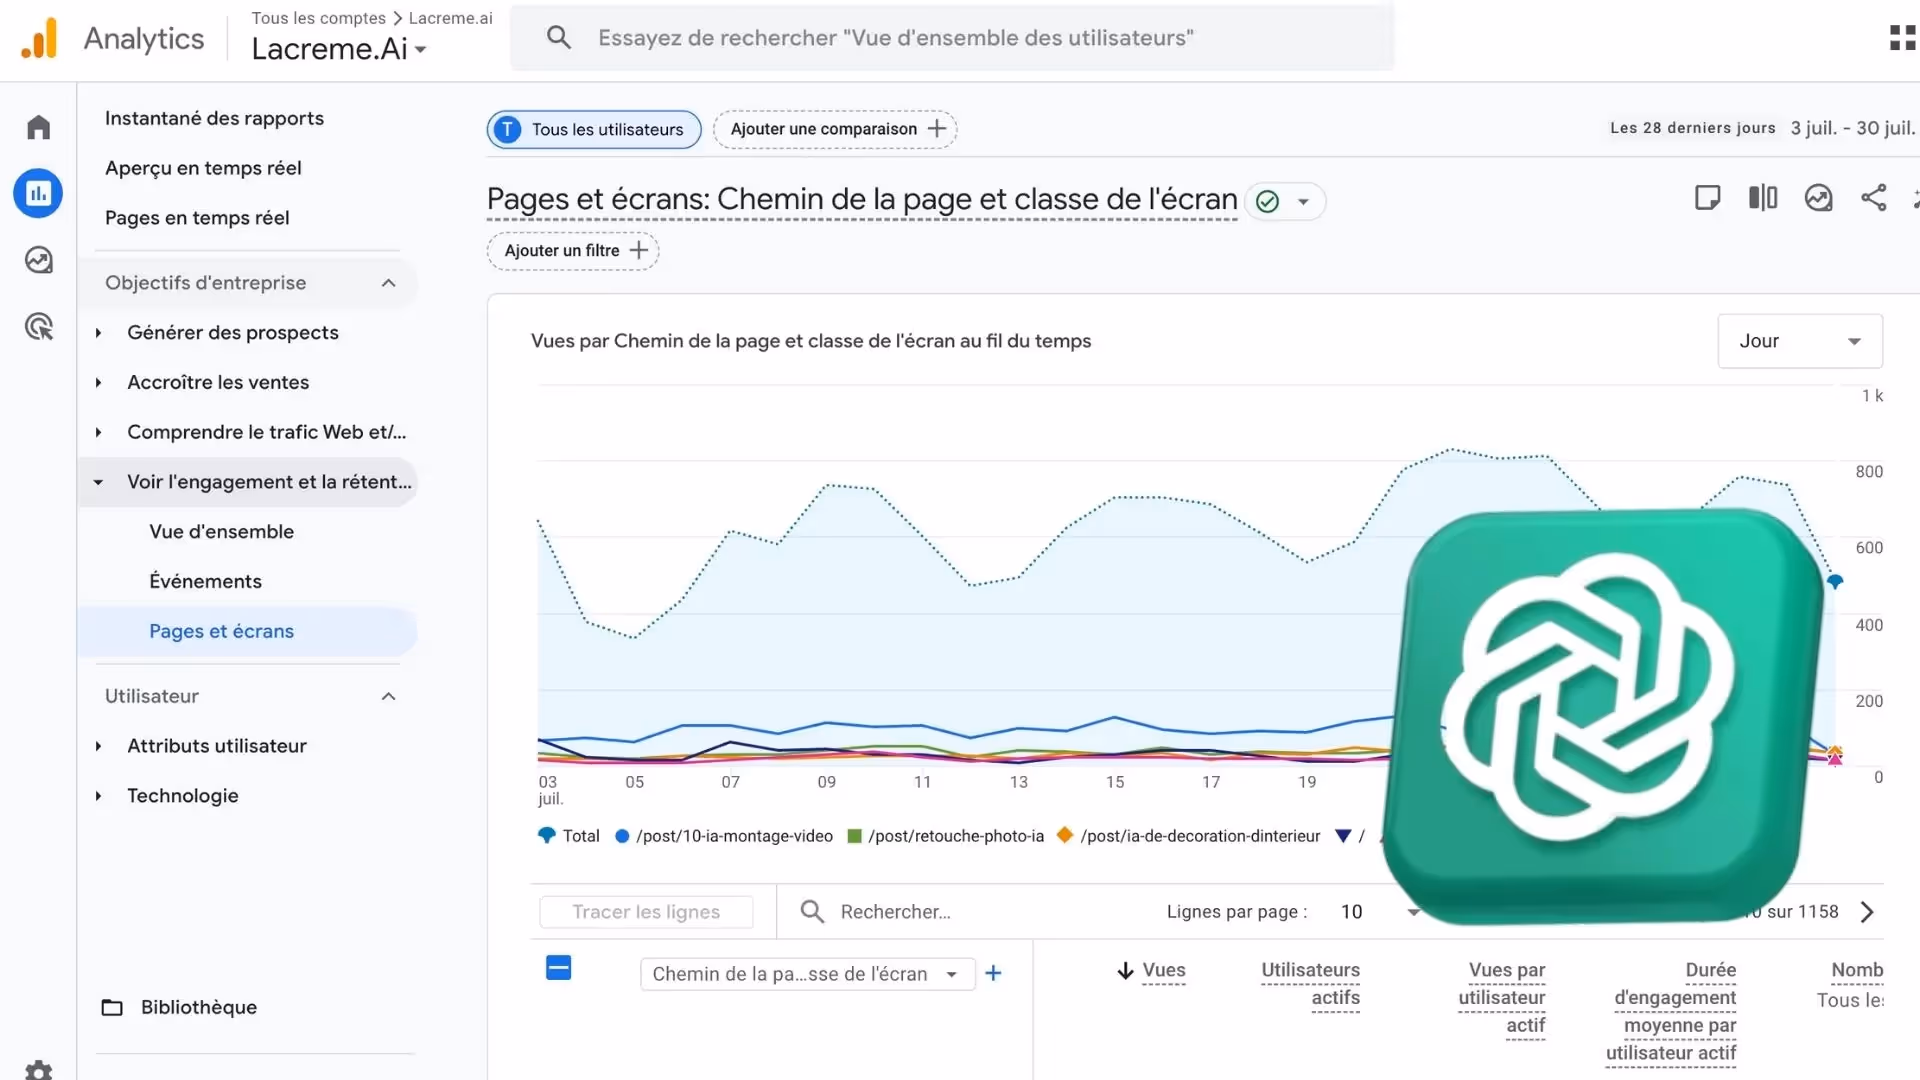
On my site lacreme.ai (an AI demonstration and testing site), I regularly publish articles about SEO, AI and practical cases. The illustration images have been generated and inserted automatically:
- Entered in Google Sheets : title of the article “AI and local producers”, quick description, desired style (photography, rural atmosphere, etc.).
- Scenario A :
- ChatGPT creates an ultra-precise Midjourney prompt (e.g. “photograph of an elderly person on a local market, fruits and vegetables, vintage atmosphere, etc.”).
- userApi sends this prompt to Midjourney.
- Scenario B :
- Upscale the 1st of the 4 images returned.
- Scenario C :
- Compression via CloudConvert, transition to WebP.
- ALT tag (e.g. “AI and local producers at the rural market”).
- Automatic insertion into the article.
Result : I get coherent and aesthetic visuals, integrated into my blog posts in a few seconds.
7. SEO & AI tips to maximize your visibility
- Optimize the ALT tag : use your main or secondary keywords.
- Use a lightweight image format (WebP or optimized JPG) : essential for charging time.
- Maintain a consistent style : if you have a graphic charter, adapt the prompt (colors, atmosphere, etc.) to remain consistent.
- Automate content production : if you have a large volume of items, this automation will save you a lot of time (while maintaining control over quality).
- Monitor your credit consumption : both on UserApi and on OpenAI (ChatGPT). Activate “auto-recharge” if necessary, or set a budget.
- Diversifying the prompts : avoid using the same structure word for word in order not to make all your images look too generic.
Conclusion: save time and consistency thanks to AI
With Make.com, Midjourney, UserAPI.ai and ChatGPT, you now have all the keys in hand to:
- Automatically generate and integrate visuals ultra realistic in your content.
- Control your branding (framing, colors, styles, etc.).
- Optimize your SEO thanks to custom file names and ALT tags.
This complete automation opens the door to endless possibilities:
- Updating hundreds of blog posts with original visuals;
- Creation of product galleries for an e-commerce site;
- Image generation for email campaigns, etc.
If you want to go further:
- Individuals or entrepreneurs in the start-up phase : I propose a free newsletter where I share concrete methods to go from 0 to 1000€ per month thanks to SEO and AI.
- Beyond this level (or if you want to speed up your results): you can Join my AI SEO support and benefit from all my turnkey automations.
- Established businesses : if you prefer to delegate content generation, SEO optimization and netlinking, contact me for a personalized audit of your site and to get ahead of your competitors.
I hope you found this guide helpful. AI is a great driver of growth if it is well exploited! Do not hesitate to share this article with others and to give me your feedback.